
|

|
This demonstration will cover making a polymer
miniature bust from concept to finished piece in lost wax bronze.
To start, I study the reference photos and make several
of these quick computer mock ups to visualize the pose, expression,
hair treatment, and technical aspect of how to build the sculpture.
|
|
 |
Left - Next, I print off
a photo to scale of a good profile shot. I drill a hole in
a board to hold a 12 inch piece of copper pipe. The pipe needs
to be able to be moved in and out of the hole easily. For a
miniature, most of the time I will hold the pipe in one hand
and sculpt with the other. This allows me to turn the sculpture
in all directions and view all angles while sculpting. Also,
I do not squish the soft clay with my left hand by holding
it directly.
Using one continuous piece of 4 gauge aluminum
wire, I slide the wire all the way down the tube and bend the
upper portion with pliers to form a structure that fits well
within the interior of the scaled image.
Right - I place a small ball of aluminum
foil in the interior of the head mass (brains) and then cover
most of the armature with polymer clay (super sculpey), down
past the top of the copper tube. I bake this portion for 20
minutes at 200 degrees to harden. This makes a firm, sturdy
armature on which I can add the soft clay. |

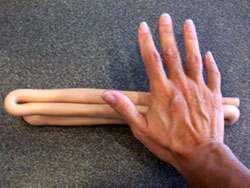
Next, the clay needs to be conditioned. Chop up 8 oz
of Premo Sculpey (hard) and 8 oz of Super Sculpey (soft). Mix
and gather the pile into a ball, then roll out into a long
rope with the palms of your hands. Fold the rope over itself
and repeat rolling to a rope. Repeat 5 or 6 times to mix and
condition the clays well. This makes a medium consistency clay
that won't crack or crumble. |

|

Above is a quick rough-in of the basic head shape/volumes.
I like to work from my computer screen whenever possible -
the images can be seen more clearly than if I were to print
them off, plus, I can zoom into any portion for a sharp view.
|

A little farther along, part of the hair, ears, and upper
body are roughed in. After the rough in is complete, I'll study
the photos and adjust/refine the sculpture to work on getting
a close likeness.
|

Another day of modeling passes. At this point, pieces of clay,
no bigger than a pinhead are carefully applied with a tiny
flat dental tool and smoothed into the surface. The ear
was modeled with a flat toothpick and an embossing tool.
|
|
I decided to go ahead and start adding her dress and pony
tail at this point. Since she is wearing a delicate little
flower
pattern dress, I thought it would be fun to make some little
flower stamps to use for the texture. I carved some tiny flowers
and cut a circle around these and baked them. This made a nice
hard stamp head that I glued on to a chop stick and imprinted
the clay used for the dress. I ended up using only the small
stamps - the others looked too big on that small space. |
|
Here she is with her little flower dress - though hard to
make out in this photo. Pony tail added also. If you don't
bake the
clay until the piece is completely finished, you can rework
any portion at any time. I pretty much reworked the entire
face to
try to get a better likeness.

|

Now it's time to put it under the bright lights, put on the
magnifier glasses and start the refinement process. The clay
can be smoothed and blended with a very small brush dipped
in lighter fluid (use sparingly).
|
After looking at these photos, I decided she
wasn't quite finished modeling. I proceeded to make her pony
tail a
bit longer and fixed the scalp portion of her hair which had
somehow ended up resembling a cantaloupe. Finally, I declared
her finished. I then placed her on a bat of polyfiber and baked
her at 200 degrees for 2 hours. That's what is great about
this clay - no special equipment needed to harden it.

After baking the clay, let it sit in the oven
and cool down completely overnight. If you take it out while
it is still warm, there's a good chance it will crack. |
|
After the piece is baked and cooled, you can polish it up with
steel wool. You can also use fine wet/dry sandpaper (use it wet)
to smooth out any rough areas.
Rinse the piece well with water, or use a can of air to blow
off all particles. Wipe well with a soft, dry rag. The piece
is now ready for the next step - molding. |

Final version in Polymer clay
|
|


