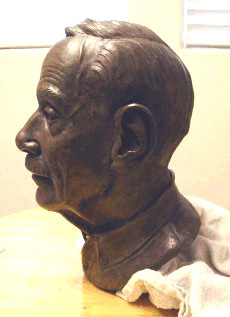
Frank - first phase -modeling in Plasteline
for cold cast bronze. This is my dad so I'm making several
copies as Christmas gifts for the family.
|
|
|
Side and front of finished model.
The surface can be smoothed with a paintbrush and sponge dipped
in mineral spirits. Then the head is sprayed with shellac to
seal it in preparation for the mold making.
|

|
|
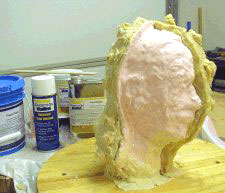
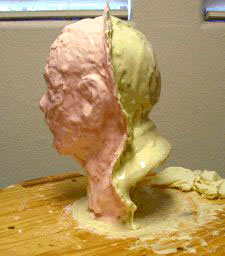
Making the mold - 2nd layer of silicone rubber has just
been applied on this 2 piece mold (left). One more thick layer
to go, then the clay barrier (divider) is removed and rubber
mold is made on the other side (right). I am testing some
new mold material - the pink is Smooth-On's Mold Max shore
20 and the yellow is Mold Max shore 10. Both of them turned
out to be too runny for vertical application (even when used
with a thickening agent), so I now use Mold Max shore 30 (which
is blue) for all of my molds. It has the perfect consistency
and is very strong.
|
|
|
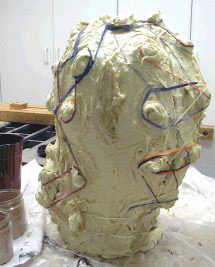
When cured, the supporting shell mold is made over the top
of the rubber mold (left). This is a fiberglass resin - light
and strong (smooth on "Plasti-Paste") . The shell
mold is made in three sections to make sure it will come off
easily - one section for the back and two sections for the
front. The next day, the mold set can be removed and is ready
for castings (right).
|
|
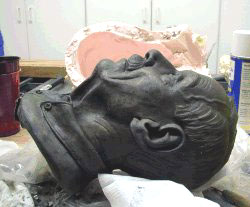 |
Mold assembled and poured. Rubberbands hold
the mold together around the knobs created for that purpose
(left).
For additional support, tie the mold tightly with non-stretching
rope or sections of bicycle tire intertube straps tied
securely around the mold. A mixture of 90% bronze powder with
10% binder and a touch of black pigment is poured in the bottom
opening and rolled around to coat the top 1/4 inch layer of the
piece. When the bronze layer has set up, the head is filled with
polyurethane resin. The pour takes 2 minutes to harden
and can be unmolded in an hour (right). |
|
|
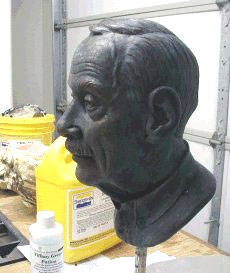
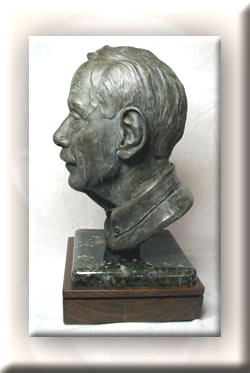
Next,
I used Tiffany green acid patina to give the piece some added
depth and color (left).
Buffed
with a dremmel tool, waxed with a layer of warm brown wax and
buffed, the piece is now ready for mounting on its base (below).
|
|

