Bonded
Porcelain or Marble Mini Demo

|
|
Left - Using an oil based
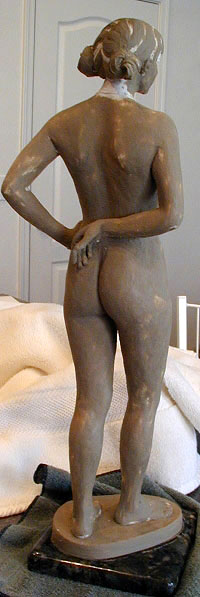
or polymer clay, model your figure over a wire armature. This
figure is 22 inches.
Right - To make the mold, place
a thin strip of clay around the outside perimeter of the figure
to divide the piece front to back. The front side of the mold
will be made first, so place sheets of clay across the gaps
(e.g., between the legs, in the underarm opening) from the
back of the figure, securing the strips of clay with smaller
pieces of clay. Press firmly, but not so hard as to distort
the surface of your clay figure. The pieces will pull off cleanly
when the front mold is finished. Push keys around the flange
from the front side about every inch or so. The keys will help
to lock the two parts of the mold together. |
|

|
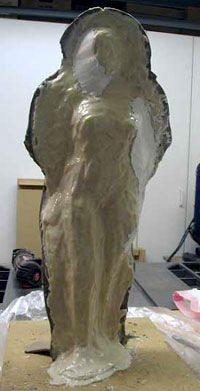
Left - Spray the piece liberally with
a mold release and then brush on four layers of rubber after
the previous layer has set. This is Polytek's Polygel 40 and
50 urethane rubber. When the rubber has cured, quickly mix
a batch of plaster the thickness of frosting and build up any
undercut areas. Spray the plaster undercuts with mold release.
Right - Cover the entire side with the
thick plaster mix. While still wet, lay pieces of wet burlap
onto the surface for added support. When this layer has set,
mix another batch and build up the plaster to an even thickness
of about 1 inch over the entire front all the way out to the
edges of the flange. |
|
|
Left - When the plaster has set up, you
can remove the strips of clay from the back that were used
to divide the mold.
Right - Since the figure is secured
into place with the rigid plaster mold, you can now remove
the armature from the back of the figure and do touch up modeling
on the hole and surrounding area where it was attached. Once
remodeling is complete, spray the back of the figure liberally
with mold release (including the now exposed rubber edges of
the front mold). The back of the mold is then built - rubber
layers, mold release, then plaster layers. |
|
|
Here, both sides of the mold are complete. Let
the plaster harden overnight and the next day, carefully pry
into and loosen the ceramic shell with a screwdriver or crowbar
until you can wiggle one side or the other off. Remove the
other side of the plaster mold. Using a pair of sharp scissors, cut
around the perimeter of the rubber mold dividing line about 1/3
to 1/2 inch. That will leave a clean edge line to separate
the two halves of the rubber mold. |
|
|
To make a casting with your mold,
open the rubber mold and spray both sides well with mold release.
Silicone rubber molds usually will not stick, but here I have
made a urethane rubber mold which will stick like glue to a
polyurethane resin filling if no mold release, or the wrong
type of mold release is used. Be sure to test the brand of
mold release you use to ensure that the fill and rubber do
not stick.
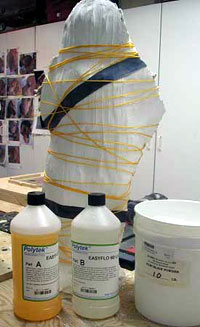
Lay the pieces of the rubber mold together tightly
in one half of the plaster mold and then lay the other plaster
side on top. Wrap the entire mold with straps of inner tube
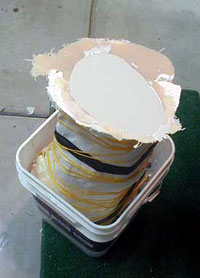
and some sort of strong twine. Invert the mold set in a bucket
and mix your fill. Here I am using a polyurethane resin (Easyflow
60) - one part A, one part B, and two parts porcelain powder.
Mixing several batches, one after the next, fill the mold to
the top. When the mold is half full, pick it up and tip it
from side to side slightly to get rid of any air pockets that
might be trapped inside. The figure can be unmolded in about
an hour. |
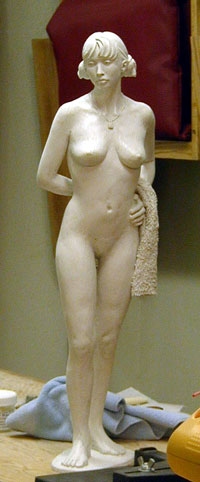
| Here is the porcelain figure unmolded.
|
I decided I didn't like the way the towel she
had draped over her arm was hanging, so I cut a piece of real
towel, soaked it in a cup of the porcelain mixture, arranged
it in place and let it harden as part of the statue.
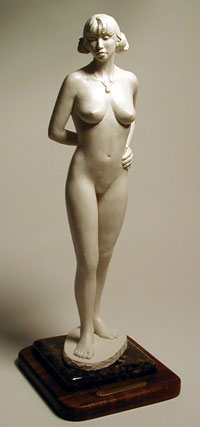
For the finish, I will cover the piece with white
wax with just a pinch of iridescent powder mixed in. Below
- finished casting from second mold.
|
You can rework any of the castings you make
- a little, or a lot - and make another mold of the revision.
Even if you ruin your mold on the first attempt,
all is not lost as long as you have made at least one half
way decent casting from it. I decided to make some changes
to the piece and make another mold, this time using silicone.
Starting with the last bad porcelain casting from the previous
mold, I removed the parts with a hammer and chisel that I wanted
to change. This included the hands and towel, which were removed
all together.
Next, I covered most of the piece with
a very thin layer of plasteline because I wanted to change
the surface treatment and the face, feet. and base. You can
even melt some of the plasteline in a microwave and paint it
on the cast porcelain piece with a small brush. Since the piece
is rigid, no support system is needed and you can easily rework
all of the parts of the piece that you'd like. |
|
|
Here we go again. Same process, just using
a different material for this mold. This is Smooth-On's silicone
rubber, Mold Max 30. Shown is the most important layer of the
mold as the first thin "bubble" layer captures
the tiniest detail. This layer should be applied with a small
brush to ensure that no air bubbles are trapped between the
model and the rubber. Subsequent layers can be applied with
a larger brush, spatula, or even a paint stirring stick

Since there is no support system now and the
piece is already rigid, when the front rubber has cured, the
piece can be laid down flat (on some pillow batting) to
make the back side without worrying about distorting the figure.
Then the two sides of the plaster mold can be made. This is
much easier than having to fight gravity with the piece standing
vertical. |
|
|

